As an Amazon Associate, we earn from qualifying purchases. Some links on this site are affiliate links at no extra cost to you. Our recommendations are based on thorough research and editorial judgment.

The Right Way to Clean a Turntable Stylus
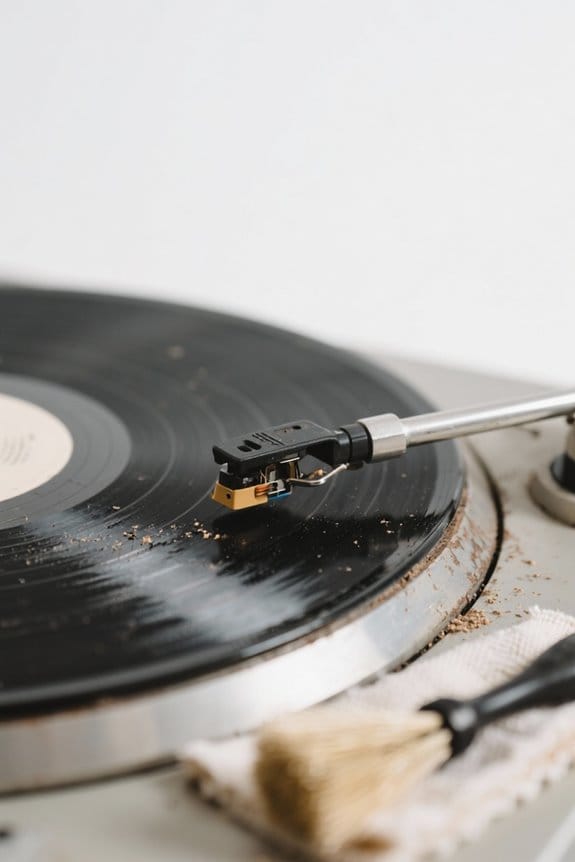
Cleaning a turntable stylus is essential for clear sound and long-lasting equipment. Start by visually checking the stylus for dust or cloudiness. Use a stylus brush to gently clean from back to front. You can also try the Magic Eraser method—just dab lightly, avoiding scratches. Aim to clean after every 15-20 records. Always use dry methods instead of liquid cleaners. These steps will help maintain your setup and improve audio quality. More tips await to guide you further.
Key Takeaways
- Regularly clean the stylus after every 15-20 record plays to avoid audio issues and maintain sound clarity.
- Use a stylus brush to gently clean from back to front to prevent deeper dirt from embedding.
- The Magic Eraser method can effectively lift grime when applied lightly without causing scratches.
- Avoid liquid cleaners; opt for non-toxic, dry cleaning methods and ensure regular inspections post-cleaning.
- Store records vertically and use a dust cover for the turntable to minimize dust exposure and protect equipment.
Why Is Cleaning Your Stylus Important?
You may be interested


Cleaning your turntable stylus is a simple yet crucial task for any vinyl enthusiast. Regular stylus cleaning prevents dust on the stylus from causing audio issues, such as muffled sound and pops. A dirty stylus can harm both your records and the stylus itself. It is recommended to clean my stylus after every 15-20 record plays, or more often for particularly dusty records. Using a stylus brush or cleaning fluid helps preserve the stylus’s integrity. These methods reduce the risk of abrasion, ensuring the best playback quality. Cleaning improves clarity and extends the lifespan of your equipment, which typically lasts for 500 to 1,000 hours. Fundamentally, clean records begin with a clean stylus, enhancing your overall listening experience. Additionally, dust and debris removal is critical as it not only protects the stylus but also enhances sound quality by reducing unwanted noise during playback.
Recognizing When Your Stylus Needs Cleaning

How can someone tell when their stylus needs cleaning? Signs include audio disturbances like pops, crackles, or skips during playback. A visual inspection is crucial; if the stylus appears cloudy or has visible debris, it’s time for maintenance. Regular checks for dust, especially behind the stylus tip, should be part of your routine. Ideally, clean the stylus after every 15-20 record plays, or more often if you’re playing dusty or older records. Waiting for a decline in sound clarity can lead to damage for both the stylus and records. By using a high-quality carbon fiber brush, you can effectively remove dust and static, ensuring optimal sound clarity and prolonging the life of your records. By keeping an eye out for these indicators and conducting regular checks, one can guarantee peak sound quality and prolong the life of their turntable setup.
Stylus Cleaning Methods

A clean stylus is essential for enjoying high-quality audio from vinyl records. Regular cleaning helps avoid distortions caused by dirt. Use a stylus brush for efficient cleaning; gently wipe the stylus from back to front. This technique prevents dirt from pushing deeper into the grooves. Some users find a clean Magic Eraser effective for lifting grime without scratching the stylus. However, remember to apply light pressure. It’s best to avoid liquid cleaners, which can damage the stylus. Opt for non-toxic, dry methods instead. Clean your stylus after every 15-20 plays for peak performance. Incorporating anti-static properties in your cleaning routine can prevent residue build-up on your records, enhancing the overall sound quality. Protect your equipment with a dust cover when not in use. Implementing these practices will maintain sound quality and prolong the life of your stylus.
The Magic Eraser Method

Utilizing the Magic Eraser Method can efficiently refresh a turntable stylus. To start, select an untreated white side of a clean Magic Eraser. Gently dab the stylus tip, allowing the foam to remove dust and debris without damage. It’s essential to apply only light pressure to avoid vibrations that could harm the stylus or cartridge assembly. Regular cleaning is recommended—aim for this method after every few record plays to maintain peak audio performance and extend the life of both the stylus and your vinyl records. Confirm your Magic Eraser is free from chemical additives to prevent residue build-up that could compromise your sound. With these steps, you can keep your turntable in excellent condition. Moreover, Regular cleaning of the stylus and platters is crucial to maintain sound quality and ensure longevity of your DJ equipment.
Recommended Products

[A Must-Have for Vinyl Enthusiasts] This two-piece stylus cleaning brush set is an essential item for vinyl record enthusiasts. Designed specifically for maintaining your turntable stylus, it ensures your records deliver optimal sound quality by keeping the stylus dust-free and grime-free.

IMPROVE AUDIO QUALITY IN SECONDS: Place the Stylus Gel underneath the needle, and gently lower the tonearm into the gel - repeat 2x times. There is no better way to remove dust and debris from your stylus.
Design for Vinyl Enthusiast: This turntable stylus cleaning brush definitely is an essential accessory for cleaning and maintaining your vinyl record player needle, keep your to keep your Vinyl Record Player in Peak Condition
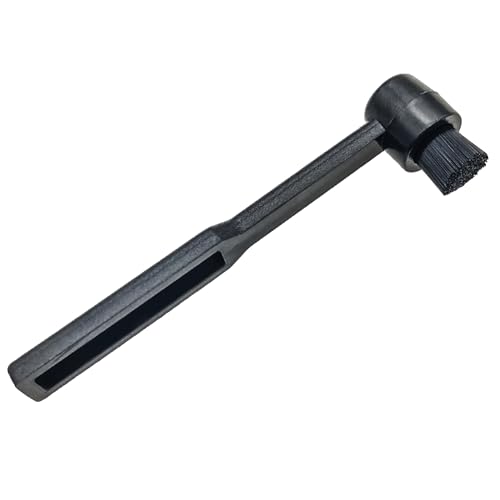
The Stylus Brush Method

For turntable enthusiasts, the stylus brush method offers an effective way to keep the stylus clean and functioning well. To clean a stylus using a stylus brush, gently move the brush from back to front on the stylus. This method successfully removes dust and debris without harming delicate components. It’s best to brush every 2-3 record sides. Maintaining regular cleaning guarantees maximum contact for clearer sound. Remember, a clean brush is crucial; if it’s dirty, it could transfer grime to the stylus. Using a stylus brush can extend the life of both the stylus and the records. A clean stylus is always important for enjoying your favorite tracks without the nuisance of pops and crackles. Regular cleaning prevents dirt buildup that affects playback, ensuring a pristine listening experience.
Recommended Products

Gently cleanse your turntable stylus: Delicate bristles effectively and safely eliminate accumulated dust and debris from any record player needle.

The Only Vinyl Cleaning Kit You'll Ever Need: extreme care & regular maintenance is paramount to every vinyl album collection, big or small. but when it comes to vinyl cleaning kits, this 4in1 vinyl care set stands out from all the rest as it provides all the efficient tools to clean, preserve, restore & protect your precious collection. our complete vinyl record cleaner kit comes with a velvet brush & cleaning fluid for your albums plus a cleaning gel for the turntable needle. Record cleaner

Vinyl Cleaning Kit: Eliminate dust, dirt, and fingerprints with our ultra-soft velvet brush and XL cleaning solution in this vinyl cleaner, ensuring your favorite vinyl records play smoothly and maintain optimal sound
The Cleaning Solution Method
When aiming to clean a turntable stylus, the Cleaning Solution Method offers an effective approach for maintaining clarity in sound reproduction. Begin with a non-toxic cleaning solution, like distilled water or a dedicated stylus cleaner. Using a soft brush to remove debris, dampen it slightly with the solution. Be careful not to soak the stylus, as excess liquid can cause damage. Ultrasonic cleaners provide a more thorough cleaning method compared to manual methods. After cleaning, regularly inspect the stylus under a magnifying glass to confirm no grime remains. This helps prevent buildup, which can affect sound quality. It is advisable to clean the stylus after every 15-20 vinyl plays. For older or dirtier records, consider cleaning more frequently. A well-maintained stylus results in better audio enjoyment.
Recommended Products

TRUSTED BY AUDIOPHILES: Thousands of seasoned audiophiles have relied on our flagship G2 cleaning fluid as their choice record cleaner for nearly a decade. Now, you can trust us with your valuable vinyl record players and vintage turntables too! Our SC1 Stylus Cleaning Fluid is a specially formulated low-alcohol stylus cleaning solution to quickly brush away dirt, dust and lint. This delicate method is a no-harm way to enhance the audio quality of your record player.
EASY, EFFICIENT, EFFECTIVE: For our record needle cleaner just lower the lifted vinyl stylus cleaner lightly against the gel bubble cleaning the stylus evenly. Perfect compliment for a stylus cleaning brush to give you the best listening experience with your records.

Hear bass and treble you've been missing. Hardened residue on your stylus masks frequencies and causes distortion — especially in the high and low range. Ultrasonic 3D vibration removes baked-on gunk without any abrasive contact, so your cartridge can track grooves the way it was designed to.
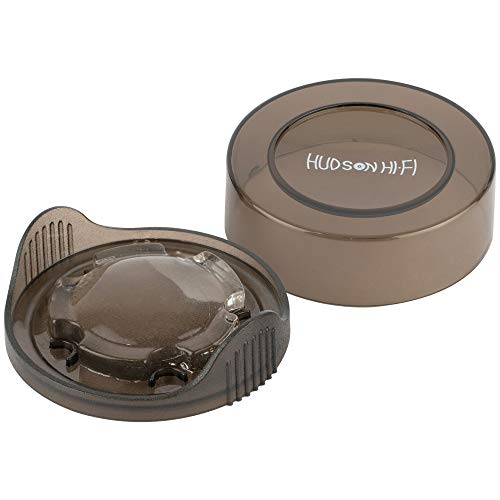
The Cleaning Gel Method
After using the Cleaning Solution Method, the Cleaning Gel Method presents another effective option for keeping a turntable stylus clean. The Onzow Zerodust Stylus Cleaner is a popular choice in this method. To use it, gently lower the stylus onto the gel pad. This helps to remove dust and debris without damaging the delicate stylus. It’s essential not to apply heavy pressure, as the stylus is fragile. The gel method leaves no residue, which can improve listening clarity. Regular maintenance is key. Aim to clean the stylus after every 15-20 plays. By keeping the stylus contamination-free, users often see enhanced turntable performance and sound reproduction. Incorporating oxygen-free copper in your audio setup can further enhance sound quality by ensuring excellent signal transmission.
Recommended Products

Record Stylus Cleaning Kit : In this Stylus cleaner kit , you will receive Cartridge Stylus Cleaner Gel*1,Anti-Static Stylus Cleaner Brush *1. With these tools, you will be able to do any turntable stylus cleaning job easily and perfectly.
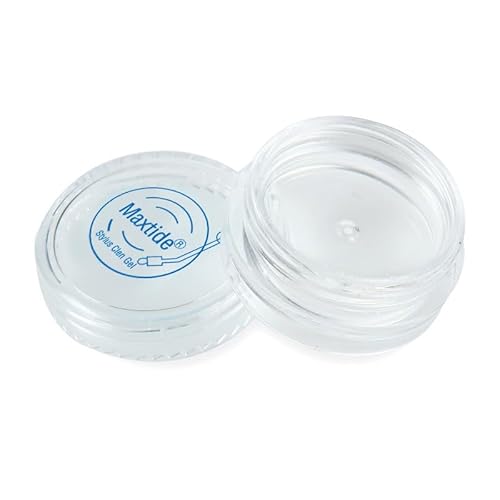
Turntable Stylus Clean Gel-Better Protect Your Records: This turntable stylus clean gel is worthy of any record lover, you just need to spend a few minutes to dips the record play needle into the gel bubble a few times, the diamond head of your needle can effectively get rid of dust and debris, thus better protect your record player.

RESTORE PRISTINE AUDIO CLARITY: Instantly eliminate dust, static, and microscopic debris from your stylus tip to dramatically improve your turntable's signal-to-noise ratio. Our specialized cleaning gel ensures crystal-clear sound reproduction, allowing you to rediscover the authentic, high-fidelity details of your favorite vinyl records
How Often Should You Clean Your Stylus?
Maintaining a clean stylus is crucial for ideal sound quality. Regular listeners should aim to clean their stylus at least once a week to prevent the buildup of dust and debris. For audiophiles, cleaning the stylus before each record side is common practice. Others might choose to clean after every 15-20 plays. If using older or heavily-used records, a higher cleaning frequency may be necessary due to increased dirt accumulation. Regular inspections of the stylus are imperative; immediate cleaning is necessary if any gunk is found. Consistent cleaning not only preserves sound quality but also extends the lifespan of both the stylus and records. A little diligence goes a long way in maintaining your listening experience. Additionally, using comprehensive cleaning kits like Fluance and Big Fudge can offer user-friendly tools that maintain both records and stylus effectively.
Tips for Maintaining Your Turntable
A clean and well-maintained turntable can make all the difference in producing quality sound. Regular cleaning of records before each session helps minimize dust on the stylus, enhancing sound clarity. Utilizing a quality dust cover protects your turntable when not in use, extending its lifespan. Anti-static tools are essential for reducing dust attraction on both records and stylus, positively impacting overall performance. Store vinyl records vertically to avoid warping, guaranteeing they remain in peak condition. Additionally, conduct regular maintenance by inspecting your turntable for potential issues. This will help keep the system running smoothly and maintain ideal playback quality. Following these tips guarantees a satisfying listening experience for all vinyl lovers. Consider using high-quality carbon fiber and nanofiber bristles for dust removal and anti-static properties to further enhance your record maintenance routine.
Frequently Asked Questions
What to Use to Clean a Turntable Stylus?
Forty percent of stylus damage occurs from neglect. Effective cleaning includes stylus cleaning solutions, gentle cleaning brushes, and drop clean methods. Regular maintenance, guided by a cleaning frequency guide, guarantees optimal performance and longevity. DIY cleaning techniques are also valuable.
How to Properly Clean a Record Player Needle?
To properly clean a record player needle, incorporate stylus maintenance tips like gentle brushing with user-friendly tools, utilize needle cleaning techniques such as the Magic Eraser, and apply vinyl preservation methods for overall audio clarity improvement and equipment longevity strategies.
How to Tell if a Stylus Is Dirty?
Approximately 75% of audio issues stem from dirty styluses. Signs include sound quality impact, visible debris during visual inspections, and degradation of stylus performance indicators, emphasizing the benefits of regular cleaning for extending stylus lifespan.
How Often Should I Clean My Turntable Stylus?
It is advisable to clean a turntable stylus every 15-20 plays, or weekly for regular listeners. Best cleaning practices, necessary cleaning tools, and frequency recommendations greatly impact sound quality and maintaining stylus lifespan through proper cleaning techniques.